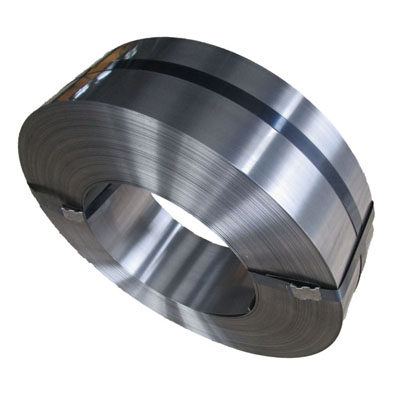
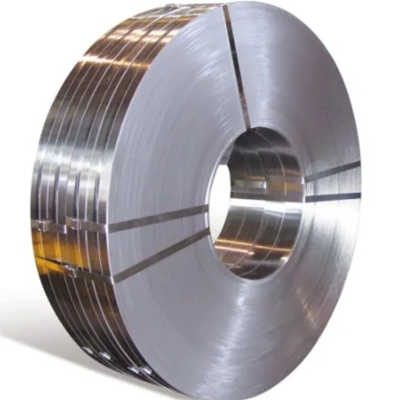
Martensitic Stainless Steel
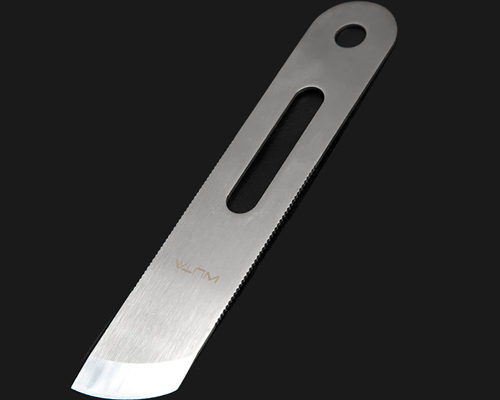
Martensitic stainless steel is a type of stainless steel alloy that has a martensite crystal structure. It can be hardened and tempered through aging and heat treatment. Its durability, strength, and corrosion resistance make martensitic steel a good choice for a variety of applications, like automotive, machinery parts, and saw blades, for products typically subjected to harsh environments and demanding applications.
| Parameters | Recommendation |
| Thickness Tolerance | T2 – T3 |
| Roughness | Class 3 |
| Flatness | Class 3 |
| Surface | Bright Polished |
| Edges | Square / Deburred / Round |
| Hardness | 41 – 57 HRC |
| Steel Grade | 420, 440, X30Cr13, X6Cr13 |

Our Advantages
• Excellent fatigue resistance
• Excellent wear resistance
• Precise thickness and width tolerances
• Maximum straightness deviation of 1 mm / 3 m
• Good surface finish
• Consistent, uniform microstructure
Steel Grades
| Comparison of Norms | ||
| EU / EN | USA / AISI | Chemical Composition |
| X30Cr13 | 420 | C: 0.26-0.40, Si: max 1.0, Mn: max 1.0, Ni: max 0.60, P: max 0.04, S: max 0.03, Cr: 12.0-14.0 |
| X6Cr13 | 440 | C: 0.60-1.20, Si: max 1.0, Mn: max 1.0, Ni: max 0.60, P: max 0.04, S: max 0.03, Cr: 16.0-18.0, Mo: max 0.75 |
Thickness Tolerances
| Thickness (mm) | Tolerances ± mm | ||||
| T1 | T2 | T3 | T4 | T5 | |
| 0.020 – 0.040 | 0.004 | 0.003 | 0.002 | – | – |
| 0.040 – 0.100 | 0.006 | 0.005 | 0.004 | 0.003 | 0.002 |
| 0.100 – 0.125 | 0.007 | 0.005 | 0.004 | 0.003 | 0.002 |
| 0.125 – 0.160 | 0.009 | 0.006 | 0.005 | 0.004 | 0.003 |
| 0.160 – 0.200 | 0.010 | 0.007 | 0.005 | 0.004 | 0.003 |
| 0.200 – 0.250 | 0.011 | 0.008 | 0.006 | 0.004 | 0.003 |
| 0.250 – 0.400 | 0.015 | 0.011 | 0.008 | 0.006 | 0.004 |
| 0.400 – 0.600 | 0.020 | 0.014 | 0.010 | 0.007 | 0.005 |
| 0.600 – 0.800 | 0.023 | 0.017 | 0.012 | 0.008 | 0.006 |
| 0.800 – 1.000 | 0.027 | 0.019 | 0.013 | 0.009 | 0.007 |
| 1.000 – 1.250 | 0.034 | 0.024 | 0.017 | 0.012 | 0.008 |
| 1.250 – 1.600 | 0.039 | 0.028 | 0.020 | – | – |
| 1.600 – 1.750 | 0.046 | 0.033 | 0.023 | – | – |
Width Tolerances
| Thickness (mm) | Width (mm) | Tolerances ± mm | ||
| W1 | W2 | W3 | ||
| ≤0.25 | ≤50 | 0.10 | 0.07 | 0.05 |
| 50 – 125 | 0.15 | 0.11 | 0.07 | |
| >125 | 0.20 | 0.15 | 0.10 | |
| 0.25 – 0.50 | ≤50 | 0.15 | 0.11 | 0.07 |
| 50 – 125 | 0.20 | 0.15 | 0.10 | |
| >125 | 0.25 | 0.20 | 0.15 | |
| 0.50 – 1.00 | ≤50 | 0.20 | 0.15 | 0.10 |
| 50 – 125 | 0.25 | 0.20 | 0.15 | |
| >125 | 0.30 | 0.25 | 0.15 | |
| 1.00 – 1.60 | ≤50 | 0.20 | 0.15 | 0.10 |
| 50 – 125 | 0.30 | 0.25 | 0.15 | |
| >125 | 0.35 | 0.25 | 0.20 | |
| 1.60 – 1.75 | ≤50 | 0.30 | 0.20 | 0.15 |
| 50 – 125 | 0.35 | 0.30 | 0.20 | |
| >125 | 0.40 | 0.30 | 0.20 | |
Surface Roughness
Available in polished bright, white, blue and yellow.
| Thickness (mm) | Roughness | ||
| Class 1 | Class 2 | Class 3 | |
| ≤0.50 | Ra≤ 0.30 µm Rt≤ 3.00 µm | Ra≤0.25 µm Rt≤ 2.50 µm | Ra≤ 0.20 µm Rt≤ 2.00 µm |
| 0.50 – 1.00 | Ra≤ 0.35 µm Rt≤ 3.50 µm | Ra≤ 0.25 µm Rt≤ 2.50 µm | Ra≤ 0.20 µm Rt≤ 2.00 µm |
| 1.00 – 1.75 | Ra≤ 0.40 µm Rt≤ 4.00 µm | Ra≤ 0.30 µm Rt≤ 3.00 µm | Ra≤ 0.30 µm Rt≤ 3.00 µm |
Flatness Deviation
Maximum flatness deviation per inch strip width.
| Thickness (mm) | Flatness Deviation | |||
| Class 1 | Class 2 | Class 3 | Class 4 | |
| 0.02 – 0.10 | P60 | P50 | P40 | P30 |
| 0.10 – 0.25 | P50 | P40 | P30 | P20 |
| 0.25 – 0.50 | P40 | P30 | P20 | P10 |
| 0.50 – 1.75 | P35 | P25 | P15 | P10 |
Straightness Deviation
| Strip Width (mm) | Measured Length (3m) | ||
| Class 1 | Class 2 | Class 3 | |
| ≤50 | 3 mm | 2 mm | 1 mm |
| 50 – 125 | 3 mm | 2 mm | 1 mm |
| >125 | 3 mm | 2 mm | 1 mm |
Hubei Baomit Steel Materials Co., Ltd.
ISO 9001: 2015 Certified Manufacturer of Hardened and Tempered (H & T) Strip Steel


